Yaaaaasssss!

It only took me *cough* three years to complete the thing, but it’s done. I present to you, the Red Heart Pineapple Squares throw blanket. Ta-da!

The table it’s sitting on is a 4′ x 4′ square and you can see it overhangs.

My camera decided to make everything very yellow, so I had to tweak all the pics, which blew out the backgrounds. This yarn is a vibrant blue-teal in real life, technically Peacock.

I used the Red Heart With Love yarn instead of the Super Saver the pattern calls for. The With Love yarns are delightfully soft. I’m pretty sure it also altered my scale so I might have an overall slightly larger blanket. The pattern calls for 6 skeins @ 364y each, but the With Love has 315y. I believe I bought 8, but I can’t be sure anymore. I got all worried last year, when did the bulk of the work, that I wasn’t going to have enough, so I bought a lot of three skeins in a panic. I can tell that I have those three new and one original left over. Thankfully I love this color.

The pattern is listed as intermediate and I’d agree with that. It’s not really a pattern you can work while watching TV, since every round is different and there are different size clusters in different places in each round. That said, once you get the swing of things you do make the same thing 12 times.

I initially started this with some leftover yellow yarn from the Monster Slippers, as a test run. Making one (some errors included) wasn’t too bad. I think I got through my first peacock square without too many mishaps, but it took forever somehow and it was clear that I would not be finishing for Christmas. I also felt like it was a bit too complicated for my skill level. My next big project was a Virus Blanket, which was easier than the pineapples, but more complicated than other things I’d done. It was a good way to prep myself to get through this blanket.

Being a South paw crocheter has some special challenges. It’s not just a mirror image of normal instructions. Things don’t always work in reverse. There are a couple very simple edge stitches that I can’t even do. In the round it means you sometimes need to start in a slightly different place than instructed, like at the next stitch or motif over. It’s entirely possible that I missed something somewhere and if I made this pattern again I could start my rounds as instructed (even though I’ve made 13 if these squares…), but I find the need to start elsewhere pretty consistent over different in-the-round patterns.

What all this means is I have to rewrite the instructions. In this case I did so more than once (the first year and the second). These aren’t really written for anyone else and don’t say things like where I start subsequent rounds, but it gives you an idea of what I need to do to get through a pattern. What I love are diagrams. If a pattern has one I hardly need to make any notes at all, just find my starting place.

Left to right: my notes on the original, half of my version 1 and both pages of version 2, with a diagram of the first 8 rounds.

Did I enjoy this project? Yes.

Would I make it again? Maybe, but not any time soon. I really don’t like to do the same thing over again. I prefer a challenge. I did actually make something else with pineapples last year, a shawl, so that was similar.

Would I change anything if I did make it again? Yes. I think I’d add another row of squares so it would be 4 x 4 instead of 3 x 4. That should be around 64″ x 64″ overall.

What did I dislike most? I hate sewing in ends and sewing together. That’s why I will probably never make anything with Granny squares. I think 12 squares is my minimum. That said, if I made this again, I might figure out how to crochet the squares together as I went instead of sewing them together at the end.

No, it hasn’t been blocked and I frankly don’t care.

Look at those pretty pineapples! (A thing I would never say if it was food!)

This is the fill in motif. You start with a magic ring, add clusters, then complete by crocheting the little motif into the available space.

This is the center of a four pineapple square. Looking at it now, it doesn’t look quite symmetrical. I might have goofed something up. I know there are a couple places where I have a 3dc cluster where a 4dc cluster should be and visa versa, but I didn’t notice any central motif errors while I was making them. C’est la vie!

All folded up and ready to give to my mom for Christmas!

image

For the last few years my intention for gift giving has been to make as much as possible myself or buy from artsy friends or people at craft shows and online marketplaces like Etsy. With the exception of books (of course), electronics, music and other similar things. The idea is to give more thoughtfully and more specifically.

image

image

image

The downsides to making and buying handmade are that I have to come up with ideas for items people will really like – I have to know them pretty well in some cases. I also have to plan way ahead. If I come up with an idea too late I might not have time to pull it off or it may be too dissimilar to the other things I’m making, increasing the time all around.

image

This year I spent to much time on a doomed gift (a huge crochet project that I probably won’t finish until June now), made two dopp kits and five aprons, and bought one pair of electric toothbrushes. In typical fashion I undertook a new pattern, graded another up a size, created several custom graphics that were overly complex for the application, and used a technique I only had vague experience with. I completed my last task, setting the graphics on two of the aprons, Christmas morning. I also forgot to buy wrapping paper (which I like the look of, but always feel so wasteful for using…) and had to wrap gifts in crumpled brown paper and tissue paper I had on hand.

image

image

image

image

Things turned out pretty well, though I made the mistake of buying twill for the aprons. It was a mistake only because the vinyl stencils didn’t stick perfectly to the slightly textured weave and images were not 100% crisp. I didn’t do the graphics on the Hawaiian fabric aprons (which I also didn’t take pics of apparently), but they weren’t lacking. I did turn the white flowers slightly pink pre washing the fabric, which is still bothering me, obviously. (Must remember to try those Tide color catcher sheets). I didn’t finish the inside of my husband’s dopp kit or get to wax it, but it looked good and came home with me anyway.

image

image

image

All in all the gifts were received well. Would I want to repeat the Food Seasons in New Orleans graphics in exactly the same way? Maaaaybe. I need to work on my process in getting complicated stencils from the sticky cutting mat to the project surface. I’ve used stencil transfer paper, but I find it to sticky. Next time I may try some clear vinyl over my stencil instead.

Now that Christmas projects are over Happy new year!

Rogues of Thread will be attending the Halcyon Craft Fair this weekend, selling holiday aprons.

I’ll also be taking orders for custom aprons. There are lots of fabrics to choose from and they can be made up in most of the designs seen on this blog. Come check us out!

image

image

image

image

image

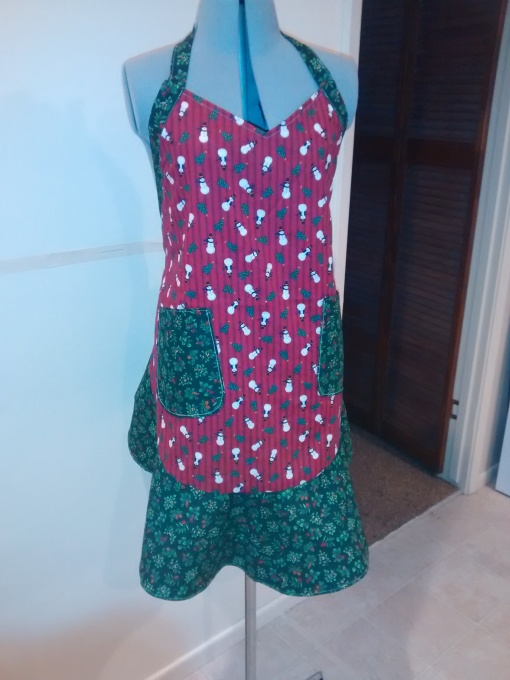
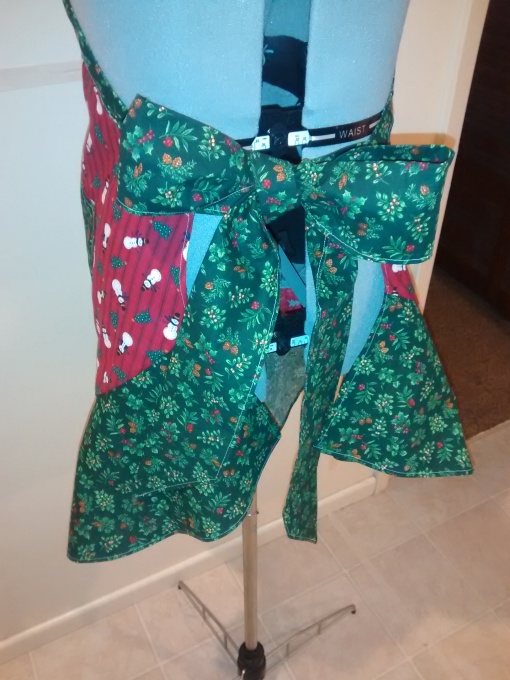
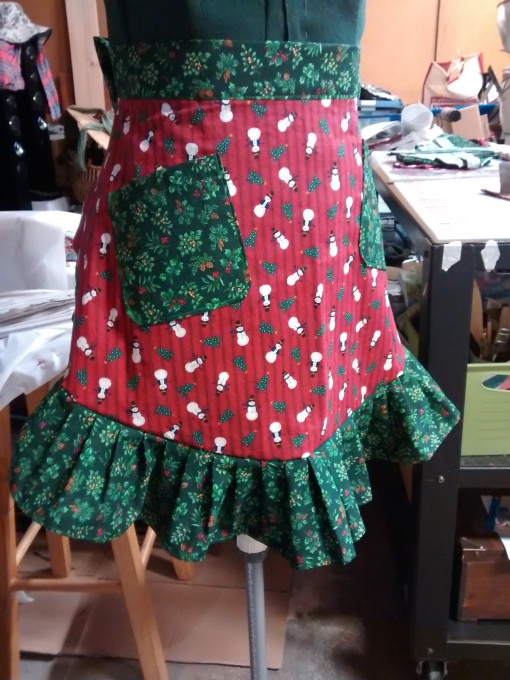
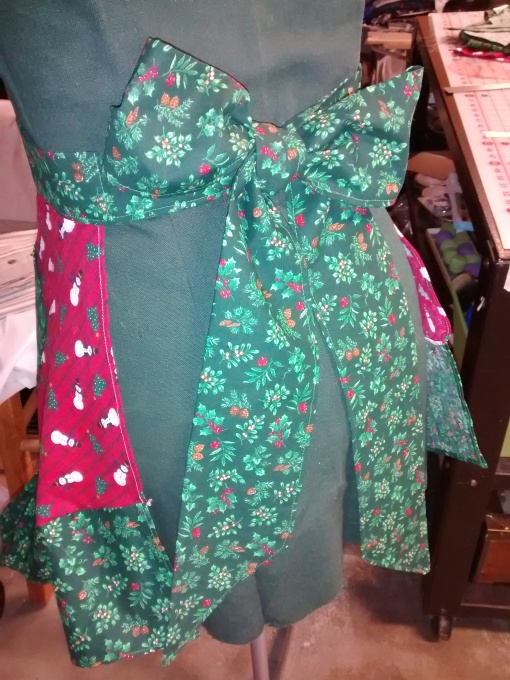
Red stripped fabric, little snowmen, Christmas trees, holy and other festive greenery. This apron has two pockets, a played flounce and a generous bow.

image

image

Two matching full length aprons for mom (or dad) and kiddo. Cute Snowman fabric and contrasting ties. Lined. The child Inge is reversible with as smaller motif from the same fabric collection.

image

image

No pockets on these. I didn’t want to cover up the snowmen.

image

image

image

image

I both like and dislike this apron.

image

It’s more size specific thanks to a shaped bodice. Now I highly dislike commercial pattern 5/8″ seam allowances. I really haven’t run into a time when I need that much seam. Most of my patterns are at 3/8″ or 1/2″ max. It’s a good size that easily allows you to iron seams open, but if you’re making something like straps you won’t need to trim the seams before you turn.

Basically I think that 5/8″ is excessive. So I was sewing along nicely at 3/8″ and realized that I needed to follow closer to this pattern due to it’s shape in the bodice, so I picked out my tiny bit of 3/8″ and went to 1/2″. I finished stitching and ironed open my seams, turned my fabric and damn – I needed to follow the pattern. The straps had excessive fabric on the bodice portion for the strap width. Grrr. Turn, re-sew, trim stupid fabric down, turn, iron. I’m done with this pattern. I do like the waist piece.

[Edited for stupid phone-auto-complete-errors]

image

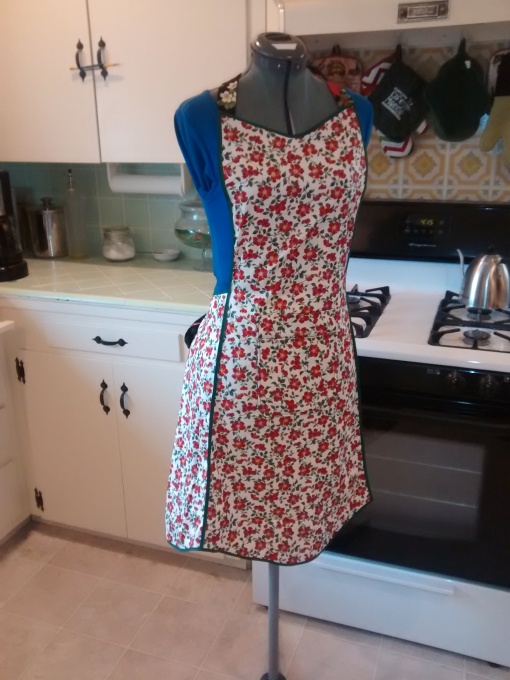
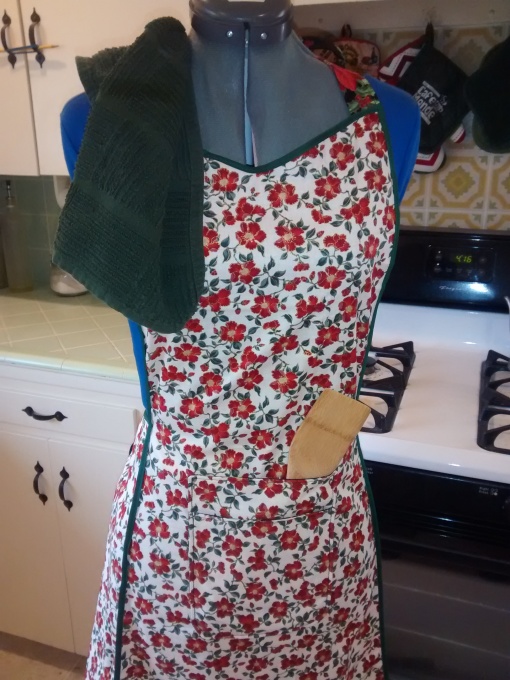
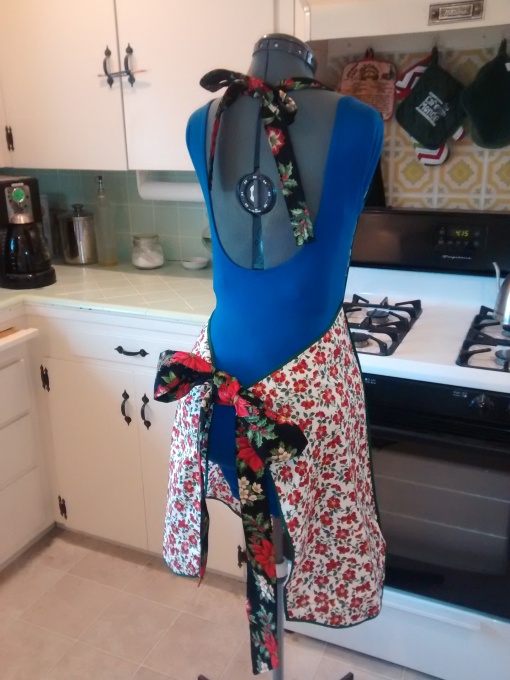
This apron is based on one my mother in law has that belonged to her mother. [Edit: I believe it was from the 1940s]. It’s not put together the way we would do it these days. The side seams are stitched with the wrong sides together and the seams bound on the outside with 1/4″ bias tape for decoration. The rest of the raw edges are given the same bias binding treatment.

image

I altered an existing pattern and didn’t like the way it had the pockets over the seams. If I avoided the seams and moved the pockets to the outside they wouldn’t be very useful so I stacked them in the center instead.

image

I think I’ll make this one again. =)

Two otherwise identical aprons, two ways to attach the flounce. Which is better? I know which my back objects to less…

image