Misc. Roguery


I did a thing – I’ve entered a Spoonflower design contest!

It’s the Spoonflower Crustation Cottage Core design challenge, running May 9 – 21, 2024. My design is called New Orleans Seafood Damask.

Even if I don’t get a single vote, I’m pretty pleased with myself. But you know, if you like my design, thank you – you should vote for it! (Go ahead, the link is right here. I’ll wait.). There are some fun designs available.

Zoomed in on the pattern – crawfish and fleur de lis. Look how the back legs overlap with the details on the fleur de lis.

(bottom left) Full pattern repeat example; (bottom right) This color combo didn’t make the cut. I like it, but it was too flat and lacks pop.

I love fabric design, but the truth is, I don’t draw terribly well. I never learned and I’m not very disciplined. Every time I try, my practicing lasts for maybe a week, then I get distracted by the next shiny thing or idea and off I go. This time I actually managed to complete something. (Pats self on back).

This design has been kicking around in my head since about… 2017… ever since I got a neat old chair that I decided to reupholster. Ask me if I’ve ever done a full reupholster from the frame out? Nope; just recovering jobs. Have I finished it? No. But I took very detailed pics of the teardown and have analysis of the age of the materials and design that I’ll share later. I also have 90% of the materials I need to do the job. All I need is some twine for retying the springs and the outer fabric. Aaaannd that’s where I got stuck – the design.

I knew I wanted something bold and New Orleans themed. I wanted Mardi Gras colors. Sadly, every version I tried was too busy. I was trying to shoe-horn four delicious sea creatures (the four food seasons of NOLA) into the design and have a seamless repeating damask pattern. I went through about 4 versions and three color schemes before I saw the prompt for the contest. By that point, I knew I had to simplify. It took me a while to settle on the colors (not at all what I’d expected) and tweak both the size so it repeats exactly the way I wanted, and the details so the two figures stand out and still coordinate. Calling it seafood based cottage core might be a bit of a stretch, but oh well.

Now the question is, how will it look on that chair? Or should I do an accent wall in my bathroom with it? NOLA here I come!

One last thing…

In case you’re interested, here are the details of the design, from my Spoonflower shop:

The scale is shown as a 7″ x 7″ repeat, with the figures at about 6″ high, but can be sized up to a 9″ x 9″ repeat, with each figure measuring about 8 1/2″ inches high.

The colors used are a deep ocean blue, with a red crawfish (it’s okay if you see him as a lobster), and a teal Fleur de lis. Overall the design has seven colors: one blue, one teal, two turquoise, one red, a pinky-red and white. Hex codes available upon request.

Suitable for home decor or whatever your heart desires. I think it would make a fun accent wallpaper in a bathroom or laundry room and I’m seriously considering scaling it down for a chair I want to reupholster with wild New Orleans flair!

Contact me for scaling and color options.
A denim repair story.

My husband is tough on his clothes. I can’t explain; I don’t know what he does. OK, I do know – he gets snagged by nails in attics, gouges himself on sheet metal and spends a lot of time crouching down. Being an electrician is particularly hard on one’s pants. He’s ripped the crotch on more pants than I care to count. That’s when he’s not ripping off a pocket, shredding the knees and hems, or just wearing out the butt. (That one I can’t explain).

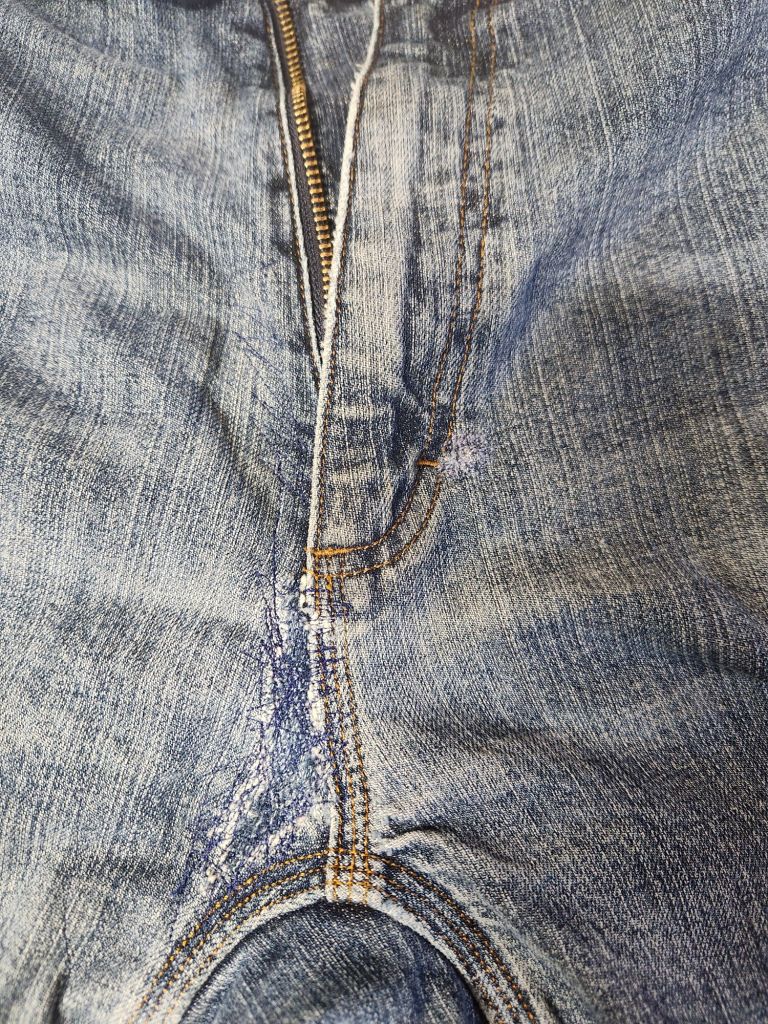
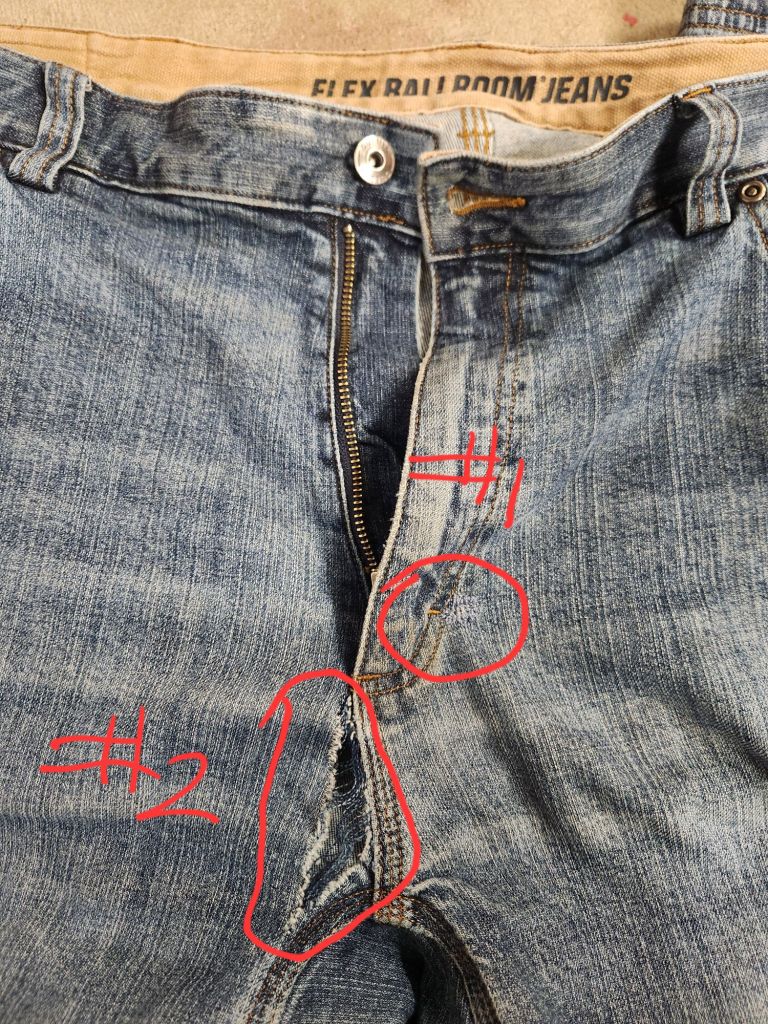
This particular pair of pants got a poke hole near the zip (#1, below, which is post repair), which I hand darned speedily and sloppily. It’s got a little piece of interfacing or some such behind it. The good news is it seems to have held up for another dozen washes so far.

And then he ripped the crotch on the other side, from the zip down, sort of shredding the fabric there (#2, below). I almost tossed the pants, but the fabric looked so good otherwise that I decided to patch the inside and darn over the whole thing on my machine. (Dreams of a professional darning machine; drools in sleep).

Materials used:

  • ripped jeans
  • old jeans to harvest some fabric
  • various semi-matching threads – a dark and a medium blue, in this case (husband does not care what repairs look like)
  • sewing machine with a narrow foot, so I could get as close to the fly as possible and a wider toe foot for zigzag / overcasting

Method:

  1. Cut the sacrificial denim big enough that it can be tacked on well over the damaged area. Don’t go too big. We don’t want to create too much bulk.
  2. Overcast the patch edges to prevent fraying.
  3. Prep the damaged pants. In this case, I decided not to trim any of the frayed area. The hole was about 1″ by 2 1/2″ and all the yarns one direction were in tact. If the hole had been worse, I might have cut out the damaged part.
  4. Pin patch in place from the outside.
  5. Usually I’ll zigzag the fabric on to avoid having a hard stitch line that can create weak spots in the future, but I was stitching over the bottom of the crotch seam edge, which is several thicknesses; I just straight stitched.
  6. Drop your feed dogs and either zigzag all over the frayed area, straying into the “healthy” fabric a bit, or do the same with straight stitch back and forth (and back and forth, and back and forth…). Essentially, you’re creating new fabric.
    • I was a little afraid that the rip would travel up from it’s present location, all along the edge of the zip, so I stitched up there, about 2″ above the bottom curve of the fly, a fair amount.

The result is not beautiful or invisible, but also not terribly obvious. They’ve been worn and washed a couple times and are holding up so far. Actually, he didn’t notice which pair had the repair, so good job me.

I don’t know if you’ve tried repairing a shoe before, but it’s a pain in the butt. Not only can leather be a pain to sew through, if you don’t have the right tools, but the presence of a sole means you have to maneuver and shift the shoe around constantly, trying to get a good angle. Not my favorite task!

Lazy Sunday work in progress

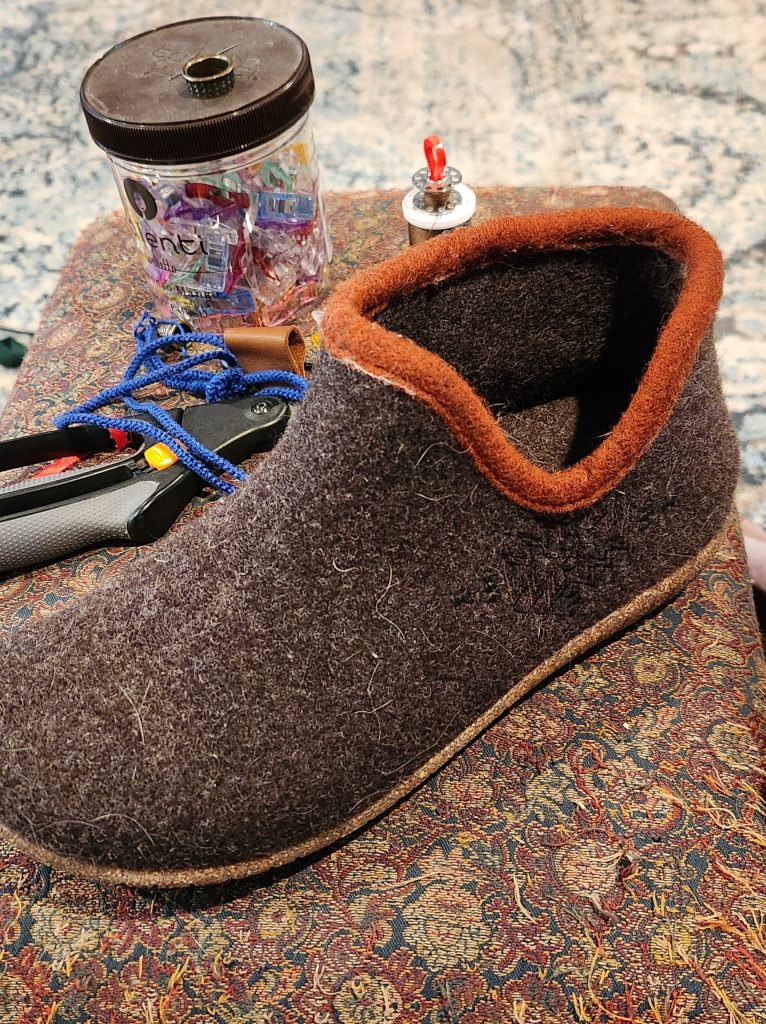
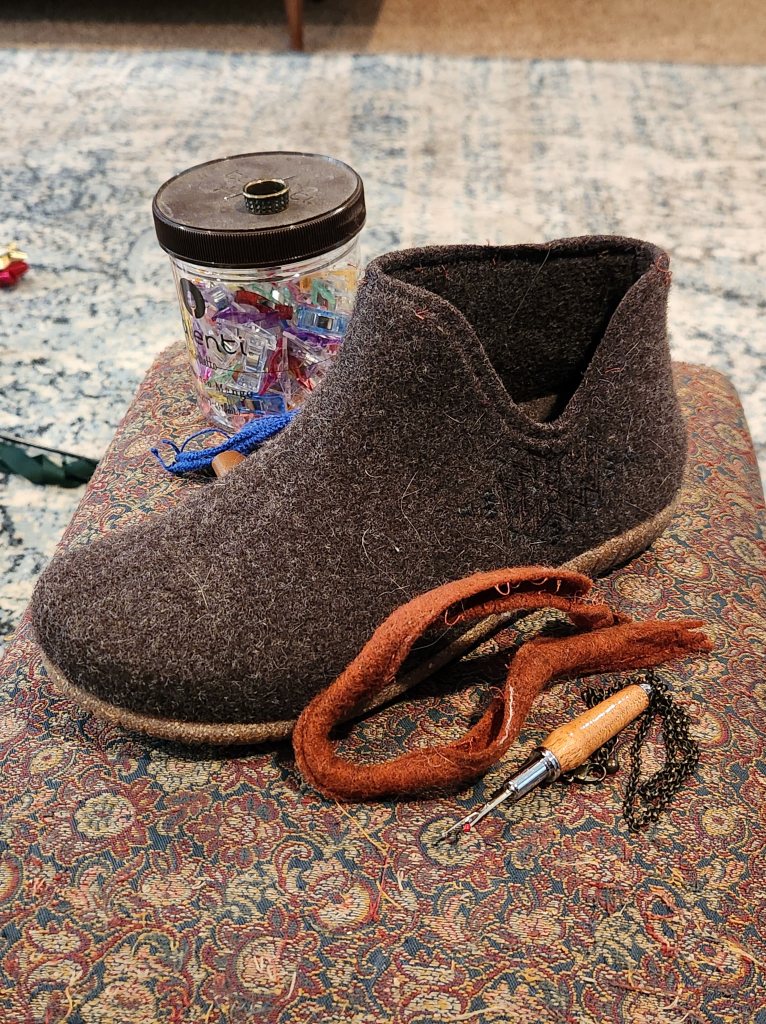
A few weeks ago I bought a pair of lightly felted wool booties that I plan to wear as slippers. They have an outdoor sole and built in arch support! And I got a good deal on them. Did I already know I am somewhat allergic to wool? Yes. Did I read the reviews that said the cuff scratched some people raw when worn without socks? I did. Did I buy them anyway? I did. I’m not going to get into a whole review of this bootie here, but they are definitely flawed. I wore them for about 4 days before I too had little raw spots on my ankles. It was time for an upgrade!

Supplies and Tools:

  • 1 strip of leather, about 18″ x 2.5″ – from the stash
  • Coordinating thread, nothing special. I used Coats & Clark poly – from the stash
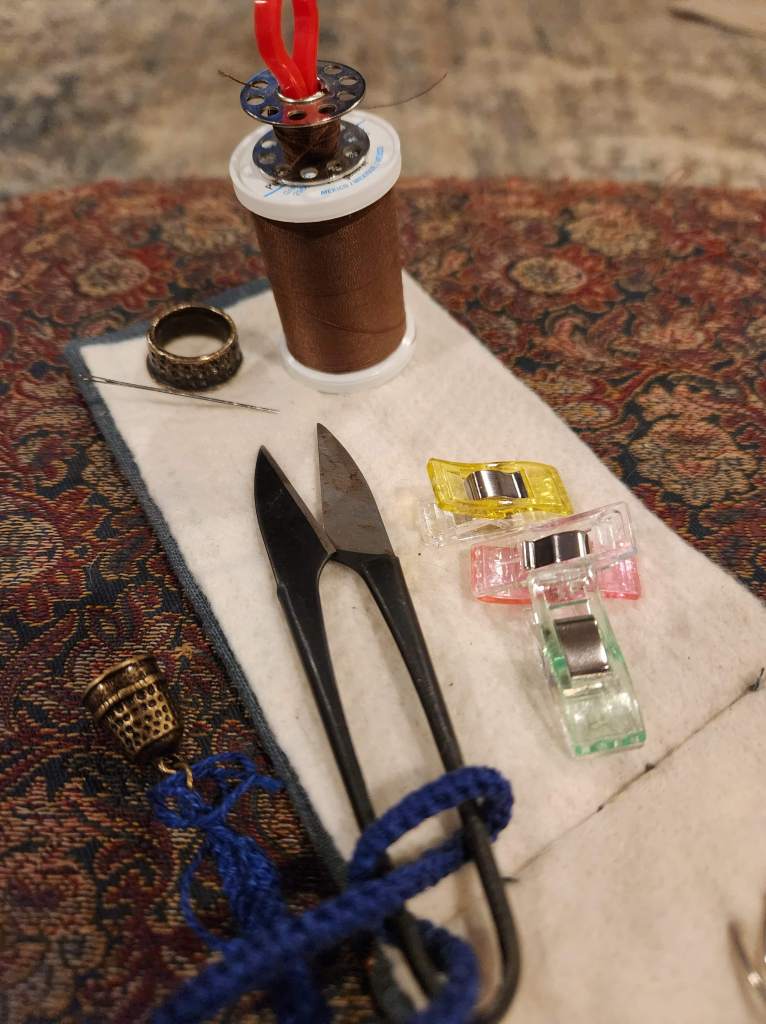
  • Seam Ripper, Needle, Fabric Clips, Thimble and Snips
Tools on a me made needle book. That’s a Medieval style thimble. Definitely my favorite type.

So, a cost free upgrade!

The booties are made of two different types of wool. The main part is a thick, somewhat felted, wool pad. It seems to be felted just enough for me, or possibly my feet are more resistant to wool itchies than my neck in a softer wool sweater. The problem is that the trim is made of a rougher wool. That was a poor design decision and probably the reason I got such a deal. No matter – I have the skills to improve them!

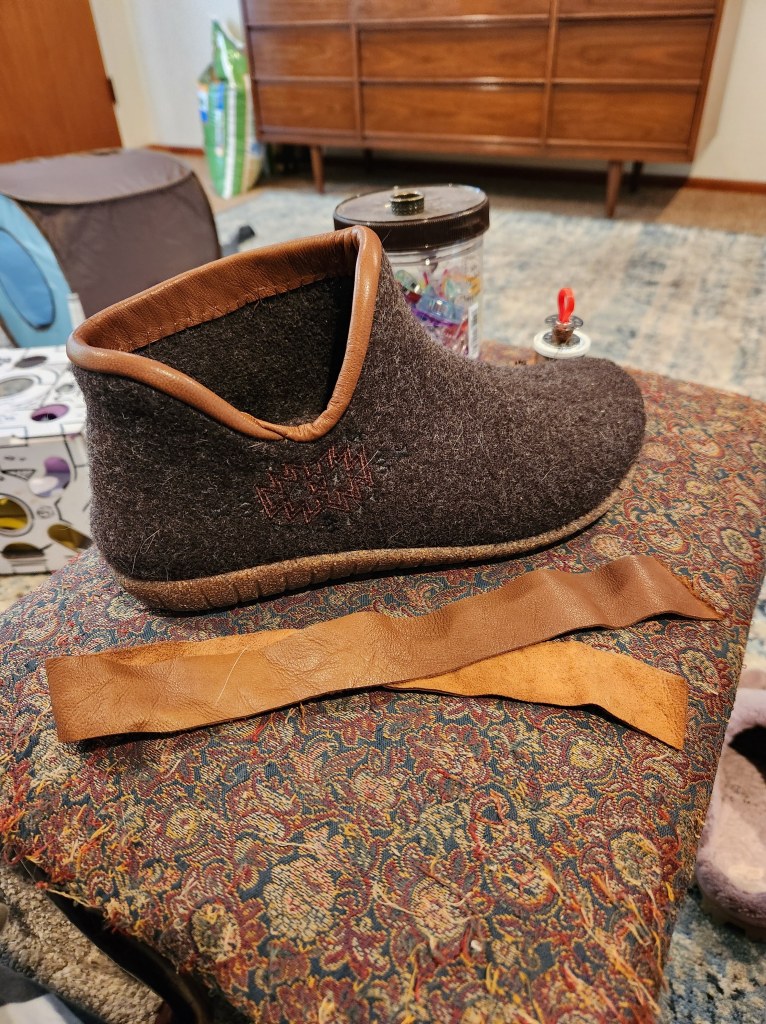
My solution was to remove the trim, which was similar to a bias binding, and replace it with a soft and flexible strip of leather that had been in my stash for probably 20 years. The strips ended up being about 1.25 inches wide, with plenty of length to overlap the ends.

I started by back stitching the right side of my leather strip to the outer top edge of the bootie. My intent was to have the leather only show a little in the outside, which allows max length inside to protect as much of my ankle as possible.

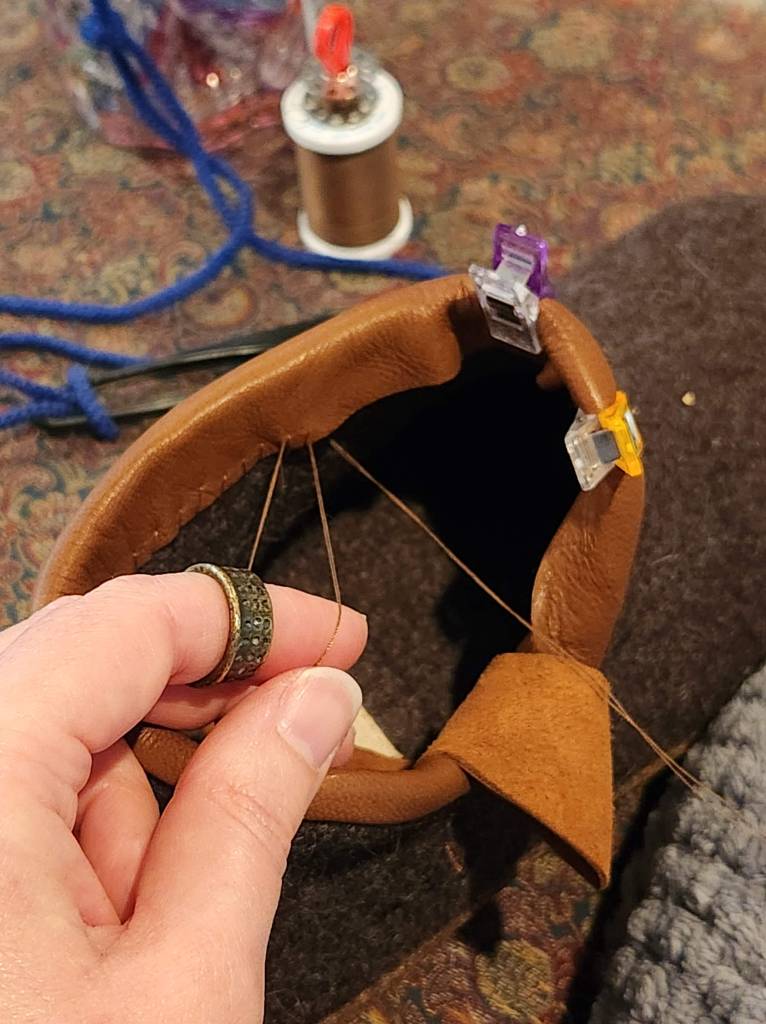
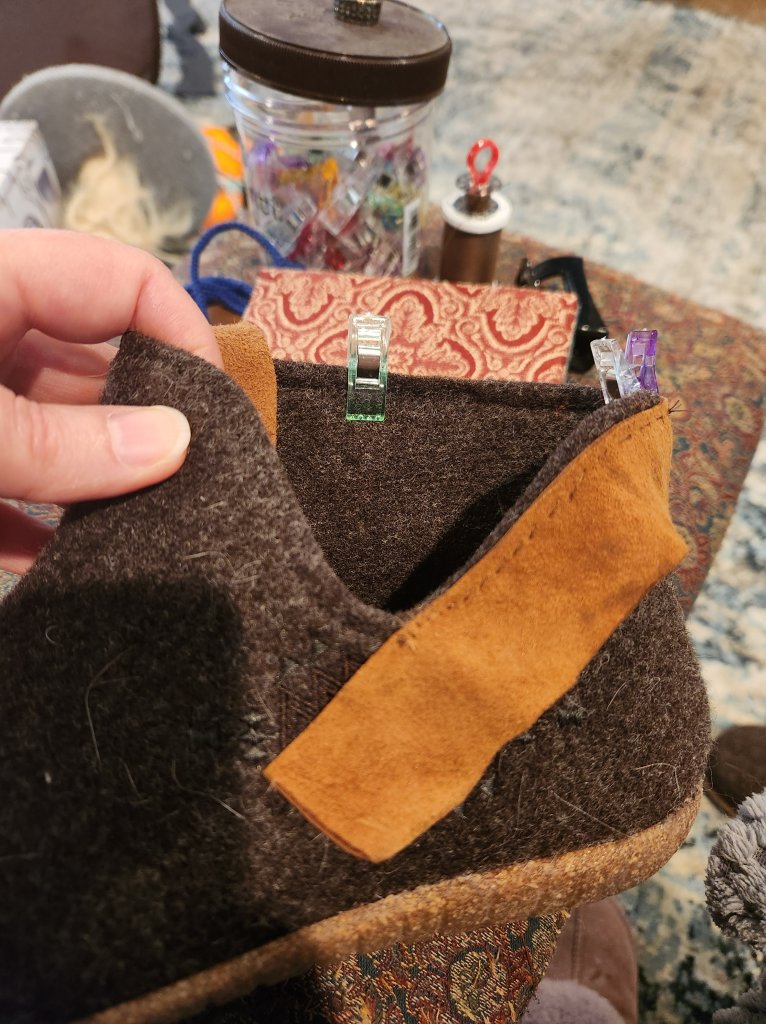
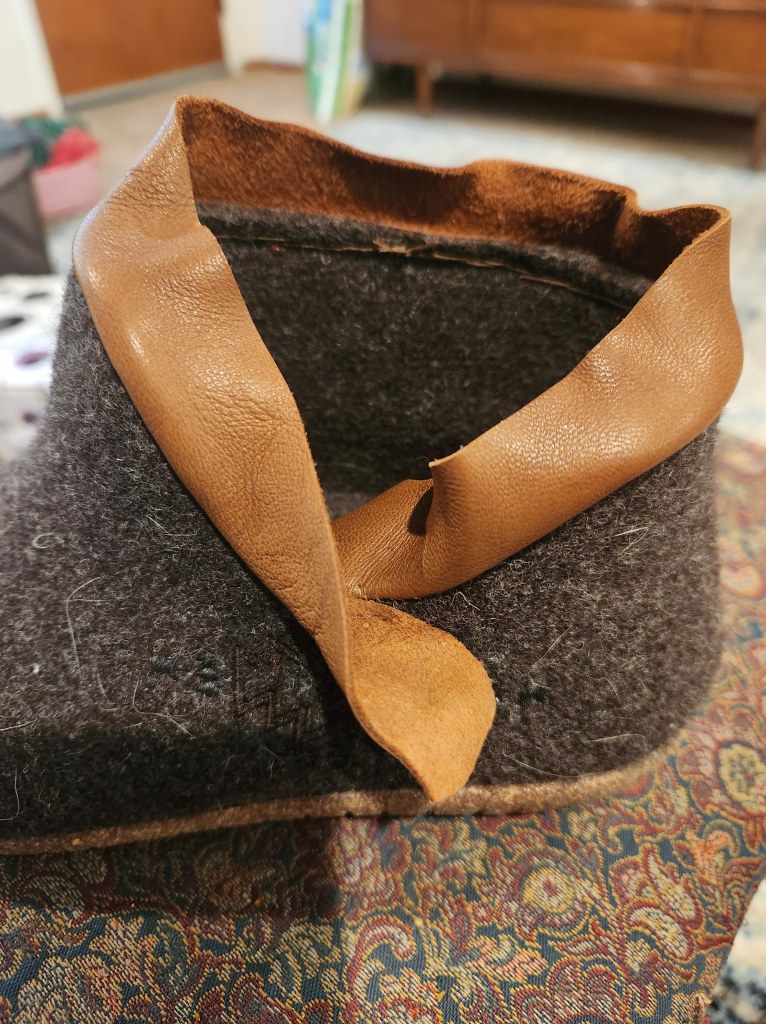
After stitching the top edge, which is the section that will show, I turned the leather to the inside and secured it with clips to make sure the leather would lay as flat as possible. After some stretching and fussing, I got it pretty flat. Of course, it’s not really possible to stitch on the inside of a small hole with all those clips in the way, so I had to remove them and re-pin short areas as I progressed. I used a straight needle to sort of hem stitch. I went through the edge of the leather, but only caught part of the wool thickness, at an angle. I overlapped the ends inside, down at the bottom of the curve and secured it, again, going for max coverage of the wool. I think it’s a good improvement!

One note on supplies: A lot of people would use a curved needle for the inside part. While that would facilitate getting the needle all the way down through the fabric – without getting it jammed into the foot-bed – I always find curved needles hard to hold. I do better with a larger curved needle, but those are also thicker and wouldn’t work in this project. I pretty much always opt for a straight needle and a good thimble.

Now, what’s next?

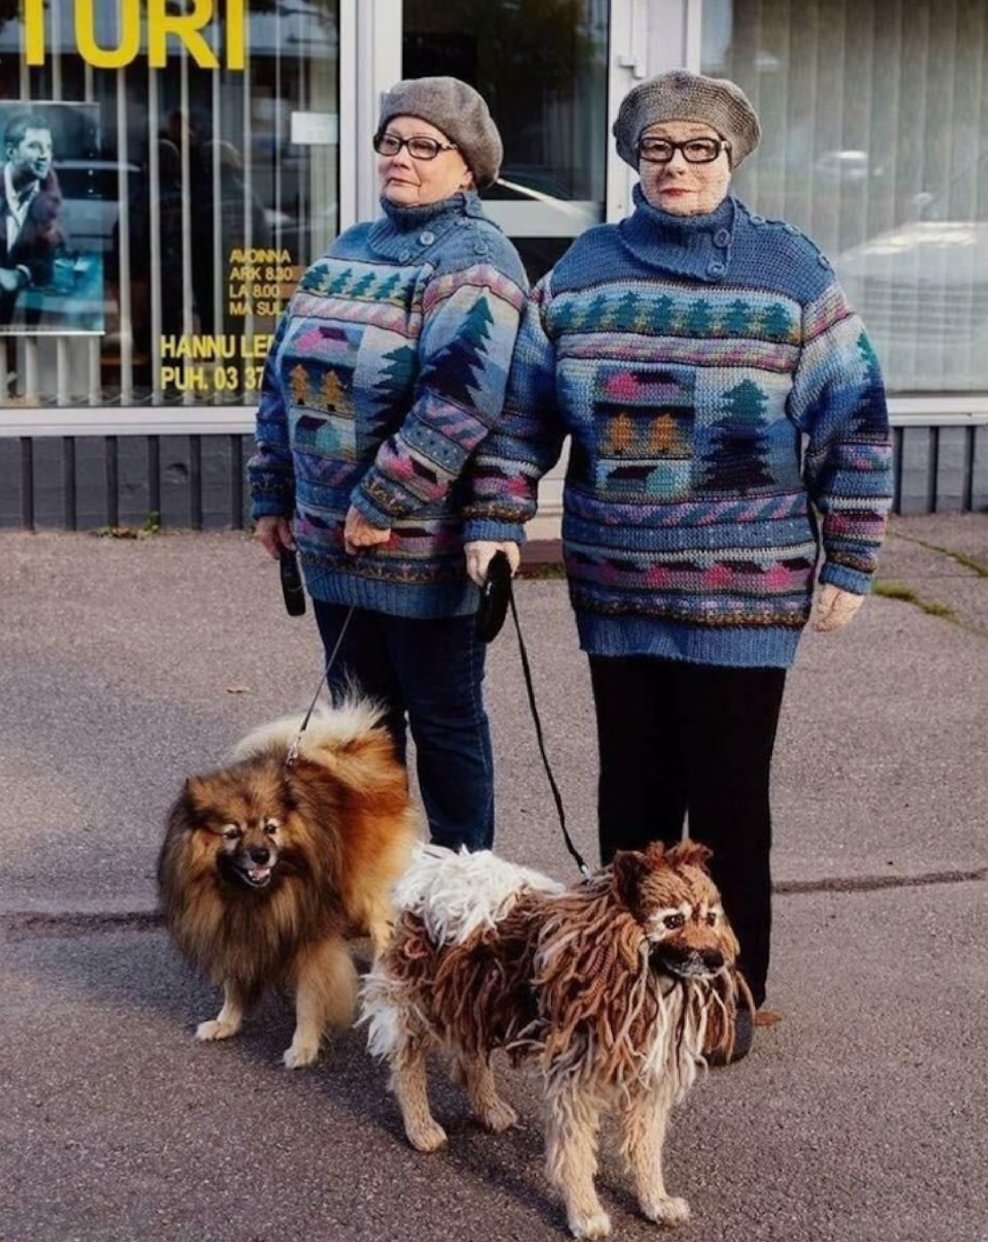
Here’s a lady in Finland who had an ambitious project to create knit / crocheted versions of other people in her village. Wow.

Image via Laughing Squid

I’ve thought a fair amount over the years about the difference between art and craft, where the line is (if there is one), whether it’s in the eye of the beholder and the value people often don’t place on craft. As a ceramic artist that was a pretty hot debate and I personally lean towards art for anything made skilfully that isn’t strictly utilitarian (though there can be some beautiful, artistic, decoration on the most humble of daily use type objects). Overall, what it comes down to, for me, is level of skill and innate or learned eye for design. To me, kids mostly do crafts and adults achieve a higher skill level. Except for the ones who don’t, due to lack of artistic skill/talent, imagination, lack of practice/interest, or intent. And of course there are exceptions both ways.

What I’m getting at here is this lady is talented. What she is doing is art. And it’s good. Look at the face of the lady with the dog. She gets the cheekbones and nose right – in yarn! Now the dog, not so much, except the legs. I think he would have been more realistic if the rest of the yarn had been brushed out. The yarn woman has all the right shapes and even seems to have similar weight as that of her real life inspiration.

Never let anyone tell you that your art (or craft – whatever you choose to call it) isn’t valuable. It’s not all going to have lasting cultural significance, but creating with your hands and imagination has lasting benefits, at minimum, for the creator and may just bring a little joy into someone’s day.

Create on!

See this post for additional yarn people creations.

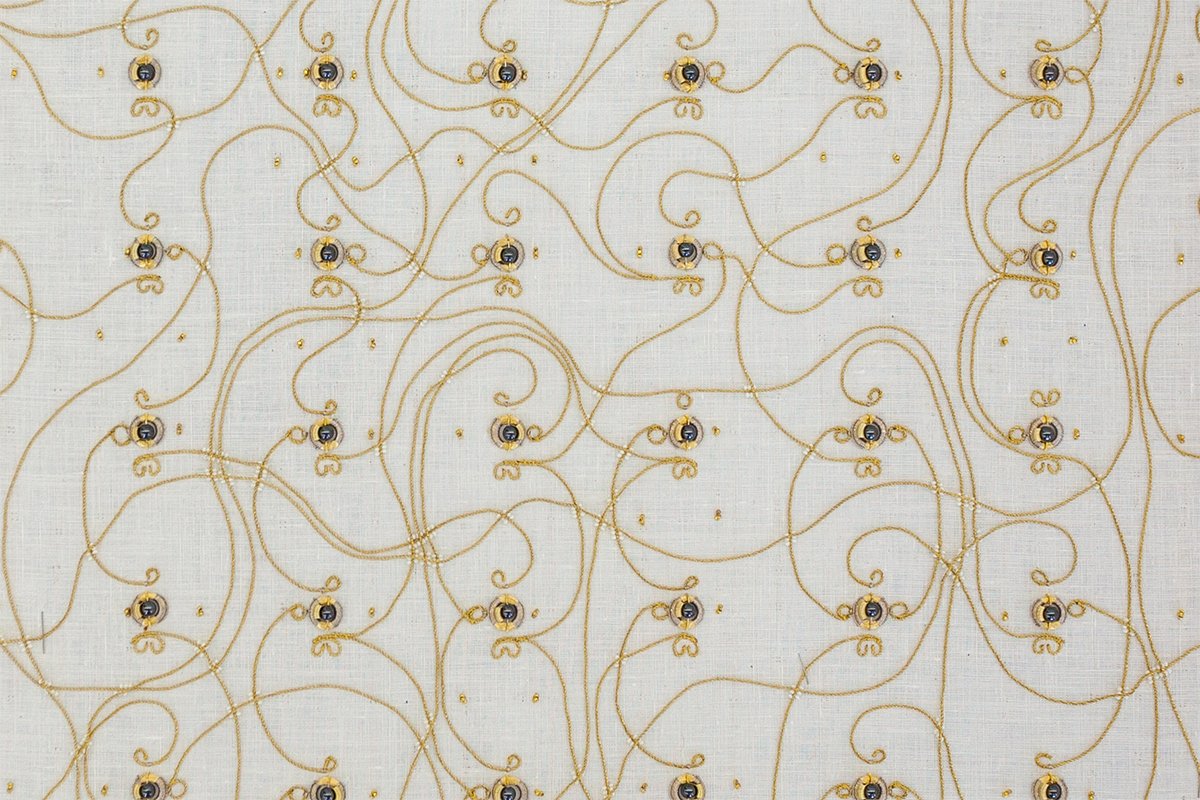
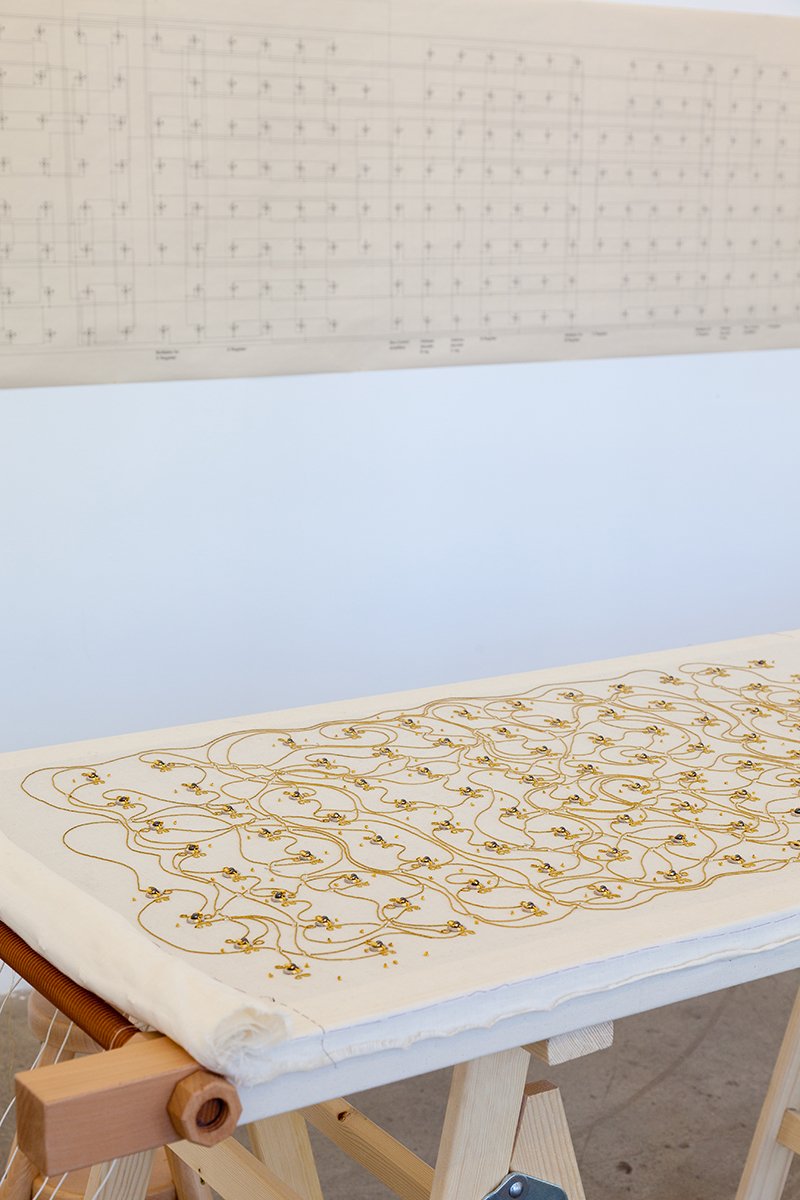
Irene Posch and Ebru Kurbak have created an embroidered computer! It uses gold embroidery thread and other traditional crafting materials to create a circuit that performs calculations. And it’s pretty! I would not have guessed it was anything but decorative.

You can read more at the embroidered computer.

Ready to wear never quite fits. Because, honestly, it’s not meant to.

RTW will only ever be your exact fit by happy accident. These items are intended to fit a body type and average size of that customer, graded up or down. Since we’re unique – and changable – we get our own unique fit issues by clothing type and brand. Even sometimes within a single brand…

  • Crotch depth in pants (and waistband gaping)
  • Bum coverage in undies
  • Bodice vs bottom sizing in dresses
  • Torso length in dresses/one-piece bathing suits
  • Bathing suits in general
  • Calf circumference in tall boots or even socks
  • BRAS. Freaking bras.

I hate bra shopping maybe slightly more than I detest pant shopping

These can be reasons we sew, but each of them includes specialized issues and techniques for a good finished product. Just because I can make a corset doesn’t mean I can tailor a suit (or want to spend the time learning to do so). Just because someone quilts doesn’t mean they can or want to sew a dress. I don’t know that I want to make my own bra…

I have a long history of being unhappy with bras (like probably 95% of you). I’m small busted with a small ribcage. My ribs are small enough that probably half the US brands don’t come in my band size. I usually find a brand that runs small and if it comes in a 32, great (but a 30 with the right cups would be better). If not I get a 34 and start on the smallest hook. That means my bras wear out faster.

Last year I bought a couple Warner bras that fit rather nicely. I even started on the outer hooks in a 34! But quickly moved to the middle ones. That was the point where I realized there was no elastic in the band, just powernet. WHAT!#@$??? The hem is folded up and I guess I assumed there was elastic inside. I already knew the bras were on the cheap side (though not MalWart cheap, that’s a whole different low) because the band isn’t lined. Lining can be cushioning, but it also means there are two layers of fabric taking the strain. Elastic helps with that even more. But not this bra. Incidentally, a similar bra in the same line, but in the previous year’s model, does have elastic. That version is lasting better, no surprise.

My solution is to add elastic. I bought some plush back to match. But how much negative ease do I need? Too much and it will be constricting. Too little, pointless. From the single t-shirt I’ve made I know that a self fabric band collar gets 15% negative ease, so that’s a place to start. But I want to do it once and be done. To the internet!

Whereupon a rabbit’s hole is discovered and an afternoon all but lost. I think I’ve mentioned before that I like research and planning and plans. Today, my rabbit hole is your gain:

  • A highly recommended bra size calculator that gives me a rather different size than what I’ve been wearing forever
  • Bra making supplies here, here and here
  • Discussions of what goes into creating an ideal custom bra pattern and challenges of a bespoke bra startup with Bra Theory (tons of great info in intricacies of underwires, finding suppliers, fittings, shape, etc)
  • Basic bra making at Threads
  • Custom drafting a bra made in your breast root measurements here and here
  • And the info I was looking for in bra elastic negative ease. Looks like that 15% is what I’ll be using.

Next stop, the actual bra upgrade.

Do you make your own bras? Alter RTW?

Also, Happy New Year to you!

This year’s color is “Living Coral,” a color I’ve been complaining about for at least the last five years. It’s a color that looks good on few and downright terrible on others. Target has been pairing it with a medium, dusky blue for years. I continue to be unconvinced that the shades go together, that they belong on clothes or that they belong in this decade.

Image via Pantone.com

Living Coral is supposed to be bright, but understated. Humanizing, reminiscent of the past but bringing us into the future, light hearted and life affirming. Or some such.

Previously:

I guess something had to be the color of the year and it’s unlikely to be a shade to my taste. Not with my general dislike of bright colors or pink. Any pink. All pinks. At least it’s not “Millennial Pink.”

I’ve been working on my husband’s Dodger beanie. Well, I really haven’t. The cat will not let me work on much of anything. When it’s cold, sometime your just have to cuddle!

Last night I got some work done. Turns out it’s hard to keep 4 yarns from tangling and to keep good tension on the logo portion. I’m not sure about the right side of the logo; it seems a bit short. We’ll see.

I removed the typical outline, reduced the height in a couple places with minimal white and the width in the vertical white sections to make up for Tunisian stitches being taller than their width.

Cat cuddling! Look at those feet!

I’m not making a lot for Christmas this year. Actually, I largely don’t know what I’m doing. Eek, that’s not going to turn out well for me, is it? I have a crocheted blanket to complete and I’m making my husband (who I seriously doubt will read this post) a Dodger beanie, semi-on-request, in Tunisian crochet in the round.

The pink logo test. What else am I going to do with that terrible yarn? And yes, I’m going to have to modify the pattern. Tunisian stitches are taller than they are wide, giving the bottom of the A too heavy a foot.

I thought the Caron Simply Soft yarns would be nice. Simple, washable, I already had white and just needed to buy blue. Well it turns out gray is a nice addition, but the blue (now in my possession) isn’t quite the right shade. I started the project, but the color was disappointing, so a-hunting I went.

At dreaded MalWart, the only place that is close to me and open after 5, I could only find the right color in the ever cheap SuperSaver skein. It’s useful yarn for big projects, but cheap and scratchy. Some of the colors have an odd, almost foamy, texture, while others are stiff. I bought the right blue and a good gray (which is surprisingly soft). I already had white. I started the project again. And again, I was disappointed. The yarn is thicker (yes, it’s #4, but technically so is the Caron) and scratchier than I’d like. So a-hunting I went.

I looked at several major yarn retailers and loaded my cart with the blue (and coordinating white and gray) yarns for further review. Between DK and sport weights, a recommended website and the very evil-in-a-good-way yarn.com, I had 7 different sets in my carts. The problem is that almost no one comes out and says “this is Dodger blue,” and I can’t find accurate hex code or pantone equivalencies, so I’m guessing. There are a lot of great choices with different compositions on yarn.com. Acrylic, superwash wool, cotton, bamboo, nylon, polyamide, cashmere, angora, etc., and pretty much every conceivable combination. There is a superwash wool/ bamboo viscose that particularly caught my eye.

I got rid of everything in one cart and reduced the other from 5 sets to 3. My thought was to pick two and return one set after viewing them in person and making the best choice.

Then I thought, ‘what the heck am I doing!?’ It’s nice to get the right materials, but I’m being wasteful. I already have two sets of not quite right. Now I was going to add two more? Shame on me.

Today I read about a company that a friend introduced me to last year, Love Your Mellon. They make beanies and donate 50% to cancer charities (they used to donate a beanie for each sold, but stopped after they hit something like 45k). With those kinds of numbers they clearly make (made in the USA) and buy in bulk, so they have a lot of options. I’m sure, like the garment industry, they are able to have yarns made to their specifications, unlike us mere mortals. In fact, Love Your Mellon’s latest hats are made partially of reclaimed ocean plastic. Good for them. Good for the environment too, as long as the reclaiming process is also environmentally friendly.

Unfortunately, there is a continued divide between available supplies for commercial makers and what we small time folks can get. My local options are MalWart (barely an option), Joann’s, Beverly’s and Michael’s and a couple independent stores that closed by the time I get off work. And the internet, of course. I’m limited to inferior mass production or expensive and hard to get to semi-mass production. Yes, there are other options, but not great ones for my current needs and situation.

Where does that leave my hat? I’m still waffling about which of my two versions to work up. Each isn’t quite right. When I do decide, I’ll finish it and let my husband decide if he’ll wear it as is. If not, I’ll offer him the option of one of those other yarns and make non-rushed, smarter decisions. Maybe someone offers swatches. Maybe some small retailers and independent retailers just need better websites. Maybe I hate shopping.

Or maybe I need to relearn patience and practice less instant gratification. Back when I had to save and plan for every single purchase, I would find something I liked and carry it around the store. If I was still interested when I was ready to leave, I’d get it. Other times, usually for bigger purchases, I’d put it back. If it was still there a couple days later and I still wanted it, I’d get it.

For further reading.

I love when something considered women’s arts (for lack of a better term) is used to subvert those stereotypes in an unexpected way. It’s even better when the woman in question did so well over a hundred years ago!

Sarah Baker’s Solar System quilt, 1876 (image from Wikipedia)

This quilt really caught my fancy – and it’s for science! A teacher, Sarah Baker, completed it in 1876 to use as an Astronomy teaching aid. And it’s beautiful! The level of hand work is really stunning. I’m not a huge fan of quilts generally as physical objects (through the stories that go with some of them can definitely sway me), but this one is stunning on its own visual merit with it’s starting black background and delicate contrasting hand stitching. It even depicts, most likely, Halley’s Comet, which was a huge topic of conversation when I was a kid in 1986 (maybe around the same age as Sarah’s students) and could be visible a second time in my life (next sighting should be 2061).

The quilt is rather large at 89″ x 106″ and is made of a wool top section with appliques, silk and wool embroidery threads, wool braid and cotton back. It took 7 years to complete!

You can read more about Sarah and the quilt on Wikipedia. The quilt is currently in the Smithsonian collection.

If you’re interested in historic quilts for science, Sarah’s was not an anomaly. Such quilts were entered into country and state fair completions and likely adorned other classroom walls. Thought perhaps not with quite as much style! There are also modern art/science quilts.

Next Page »